This document help you to record your screen, used for Windows.
Click here to download Free Cam software (free license). Extract zipped file and install the application on your computer.
To start a new recording:
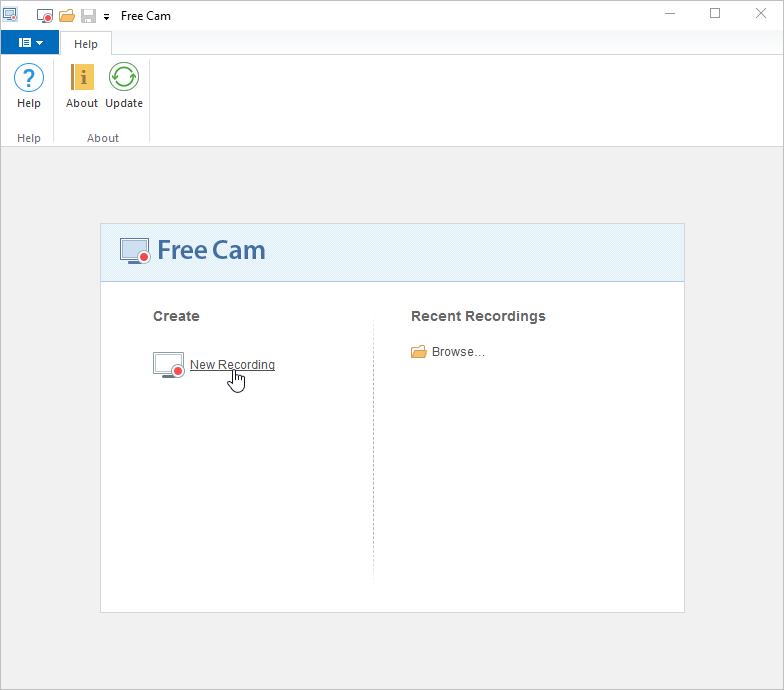
1.Run the Free Cam application.
2.Click New Recording in the in the opened window.
3.The screen recording area will pop up. Select the area that you would like to record from the menu:
- Video 16:9
- Video 4:3
- Fullscreen (even for multiple monitors)
- Custom area
- Particular application
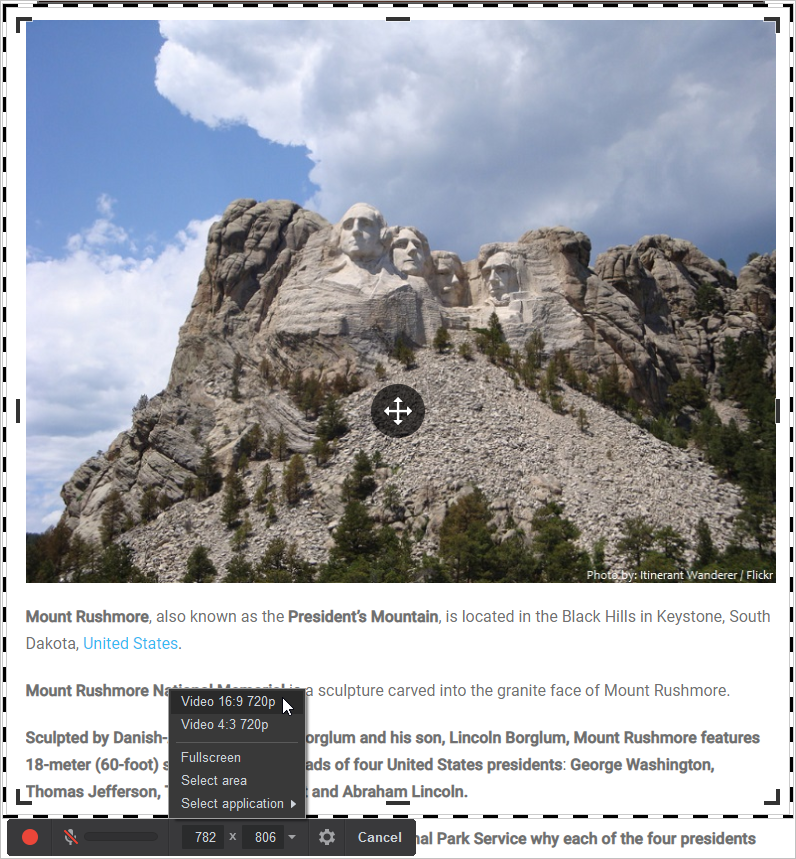
To record just a portion of your screen (custom area), choose Select area in the menu. Then, click and drag to outline the area you wish to record on the screen.
4.Move and resize the recording area to a different location on the screen if necessary.
- To move the recording area, click and drag the central icon to a new location on the screen.
- To resize the recording area, click and drag handles around the recording area in or out.
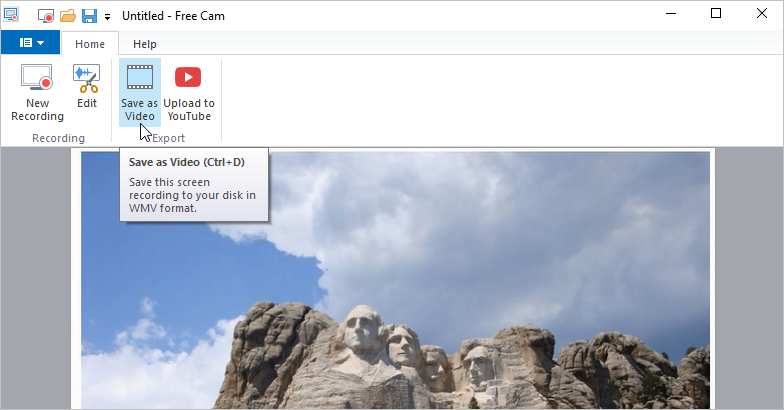
5.When you’re ready to start recording, click the red Start Recording button on the left side of the Free Cam toolbar.

6.When you are finished, you can stop recording by clicking Done in the right side of the toolbar or the Esc key on your keyboard.

7.You can save your recording as a video file right on your computer. Just select the Save as Video option, and the Save As window will open. You can enter the video name and choose a folder on your computer to save it.