
Để chuyển dữ liệu từ Zimbra lên Google Workspace dùng mail client, cần cấu hình 2 tài khoản trên mail client (tài khoản Zimbra và tài khoản Google Workspace). Hướng dẫn này áp dụng cho bản Outlook 2010:
1-Tạo tài khoản Zimbra
- Khởi động Oulook
- File -> Add Account
- Chọn Manually configure server settings or additional server types, click Next
- Chọn Internet E-mail, click Next
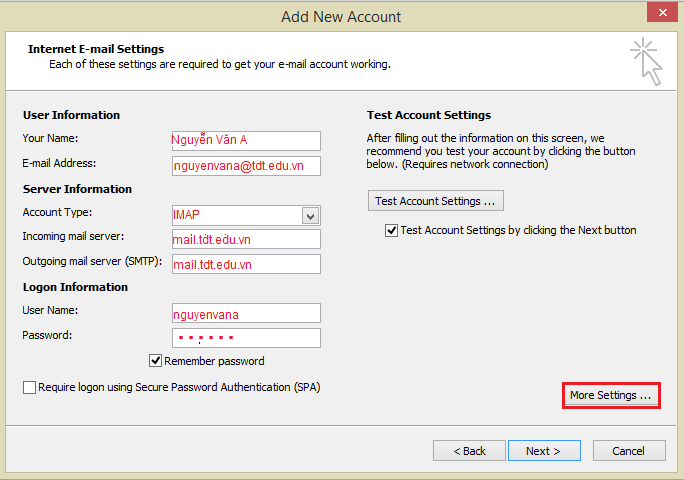
- Nhập thông tin:
- Your Name: họ tên người dùng
- E-mail Address: địa chỉ email cũ
- Account type: IMAP
- Incoming mail server (IMAP): mail.tdt.edu.vn
- Outgoing mail server (SMTP): mail.tdt.edu.vn
- Click More Settings
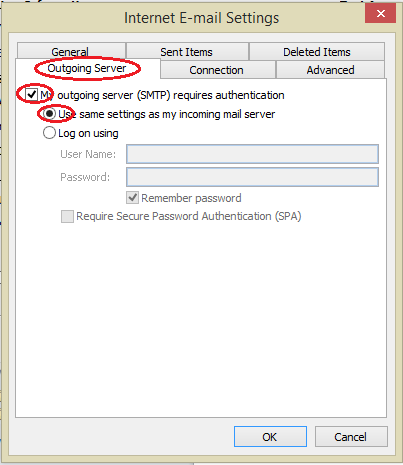
- Vào tab Outgoing server: Chọn My outgoing server (SMTP) requires authentication và Use the same settings as my incoming mail server
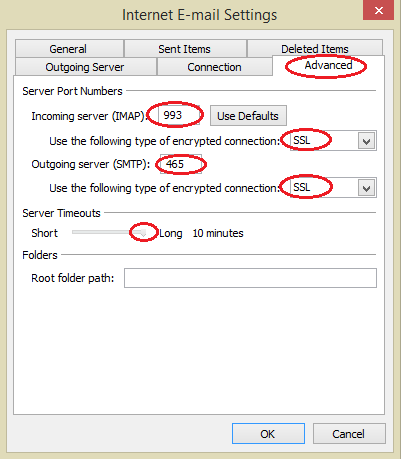
- Vào tab Advanced: chọn Server Port Numbers như sau:
- Incoming server (IMAP): 993, encrypted connection: SSL
- Outgoing server (SMTP): 465, encrypted connection: SSL
- Chọn Server timeouts: 10 phút
Click OK và Finish.
2-Tạo tài khoản Google Workspace
Bước 1: Cho phép Google Workspace chấp nhận các ứng dụng không an toàn
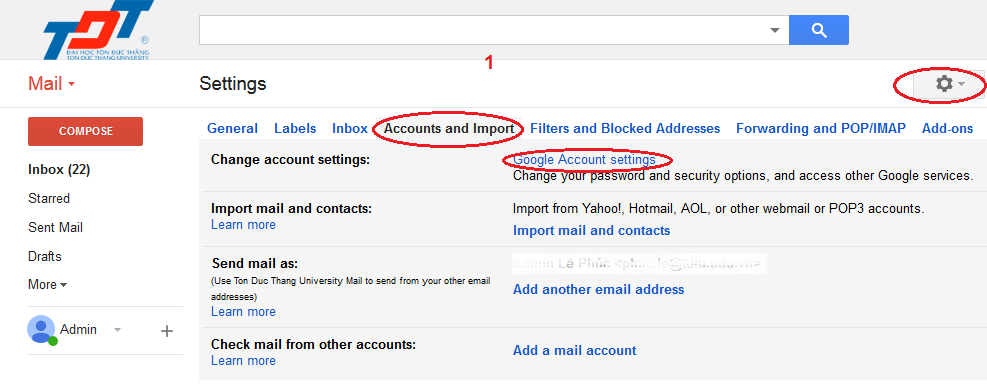
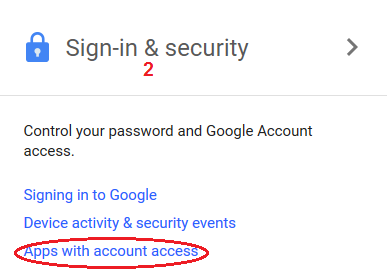
- Đăng nhập vào tài khoản Google Workspace
- Settings -> Accounts and Import, chọn Google Account settings
- Trong mục Sign-in & Security, chọn Apps with account access
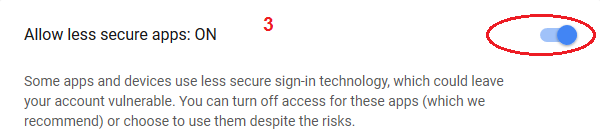
- Chọn Allow less secure apps: ON
Bước 2: Cho phép truy xuất tài khoản Google Workspace bằng IMAP
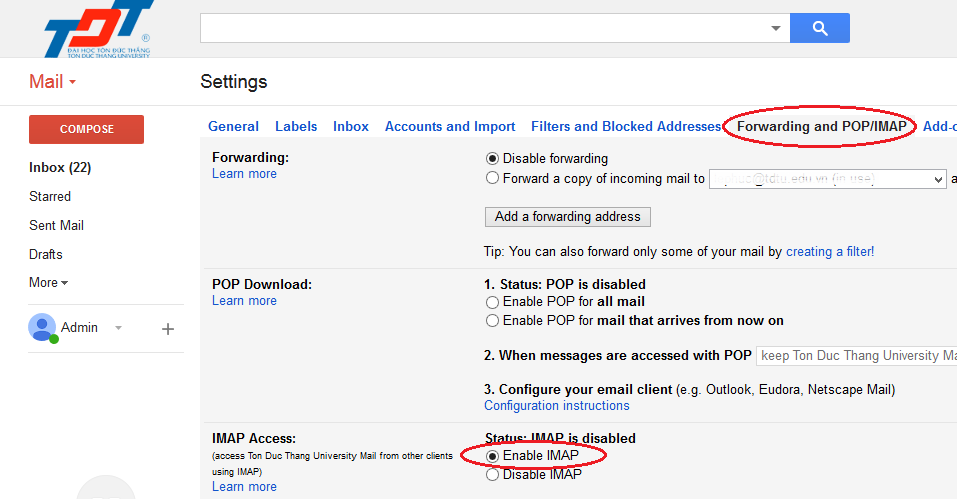
- Đăng nhập vào tài khoản Google Workspace
- Settings -> Accounts and Import, chọn Google Account settings
- Đến mục IMAP Access, chọn Enable IMAP
- Di chuyển về cuối màn hình và chọn Save changes
Bước 3: Tạo tài khoản Google Workspace trên Outlook
- Khởi động Oulook
- File -> Add Account
- Chọn Manually configure server settings or additional server types, click Next
- Chọn Internet E-mail, click Next
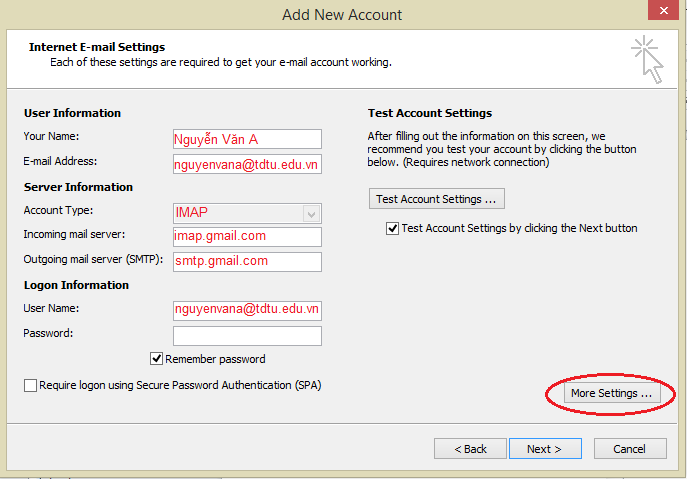
- Nhập thông tin:
- Your Name: họ tên người dùng
- E-mail Address: địa chỉ email TDTU
- Account type: IMAP
- Incoming mail server (IMAP): imap.gmail.com
- Outgoing mail server (SMTP): smtp.gmail.com
- Click More Settings
- Vào tab Outgoing server: Chọn My outgoing server (SMTP) requires authentication và Use the same settings as my incoming mail server
- Vào tab Advanced: chọn Server Port Numbers như sau:
- Incoming server (IMAP): 993, encrypted connection: SSL
- Outgoing server (SMTP): 465, encrypted connection: SSL
- Chọn Server timeouts: 10 phút
Click OK và Finish.
Bây giờ, người dùng đã có hai tài khoản email trên cùng bản cài Outlook. Để máy hoạt động vài phút để đồng bộ dữ liệu giữa server và client, sau đó thực hiện thao tác sao chép dữ liệu giữa hai tài khoản theo hướng dẫn ở đây.